
For successful backyard maple tapping, choose healthy sugar maples at least 12 inches in diameter, and tap during freeze-thaw cycles in February to March. Use a 5/16-inch drill bit, make holes 1.5-2 inches deep at a slight upward angle, and insert spiles firmly. Collect sap daily, store it in cool places, and process within 24 hours. Clean all equipment with a bleach solution before starting. These fundamental steps will transform your urban yard into a sweet syrup sanctuary.
7 Best Backyard Maple Tree Tapping Tips Today
Five essential factors determine successful backyard maple syrup production.
First, select the right trees—sugar maple trees offer the highest yield, though black, red, and silver maples work too. Make sure your trees are mature (12+ inches diameter) and healthy before tapping.
Timing matters greatly; tap between mid-February and mid-March when temperatures fluctuate above freezing during the day and below at night.
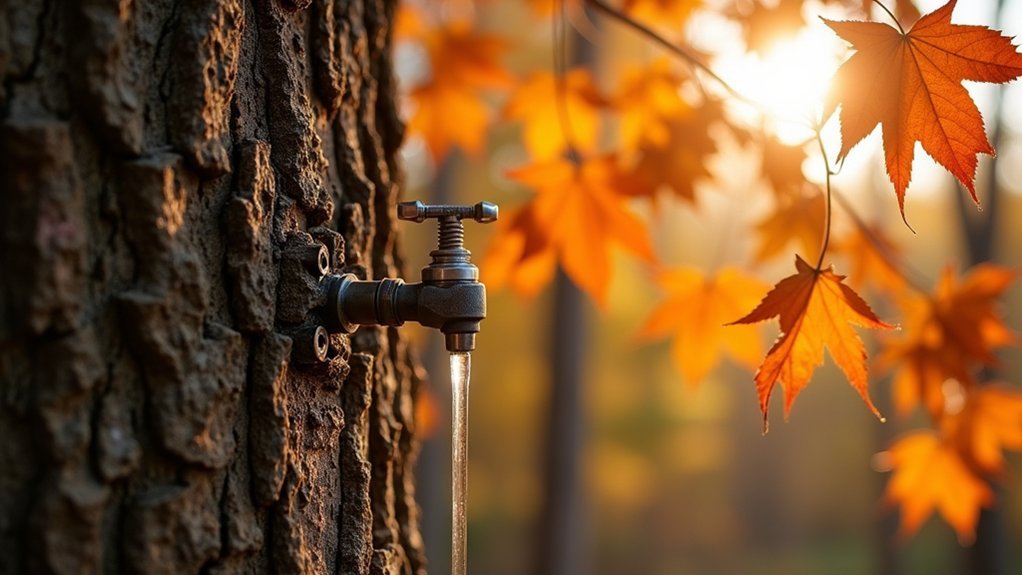
For best results, drill a 5/16-inch hole 1.5-2 inches deep at a slight upward angle, positioning taps about 3 feet from the ground.
When you collect sap, use clean, sealed containers and check them regularly to prevent overflow.
Process your sap quickly—within a few days—to maintain quality.
Watch weather patterns closely, as ideal sap flow occurs when daytime temperatures reach 40°F and nighttime temperatures drop to 20°F.
Selecting the Right Urban Maple Trees for Maximum Sap Yield
While identifying potential trees in your urban landscape, prioritize sugar maples for their considerably higher sugar content and sap production. Black, red, and silver maples are viable alternatives but yield less sap.
Choose mature trees at least 12 inches in diameter that receive ample sunlight and are free from damage or disease to guarantee ideal flow when temperature creates pressure within the trunk.
- Measure tree diameter to determine appropriate tap numbers: one tap for 12-20 inches, two for 21-27 inches, and three for larger trees.
- Install your sap collection system on the south side of trees for maximum sun exposure.
- Avoid areas with large branches or roots that might disrupt sap flow.
- Select trees away from roadways to prevent contamination from vehicle exhaust or salt.
Essential Tools and Equipment for City Maple Tapping
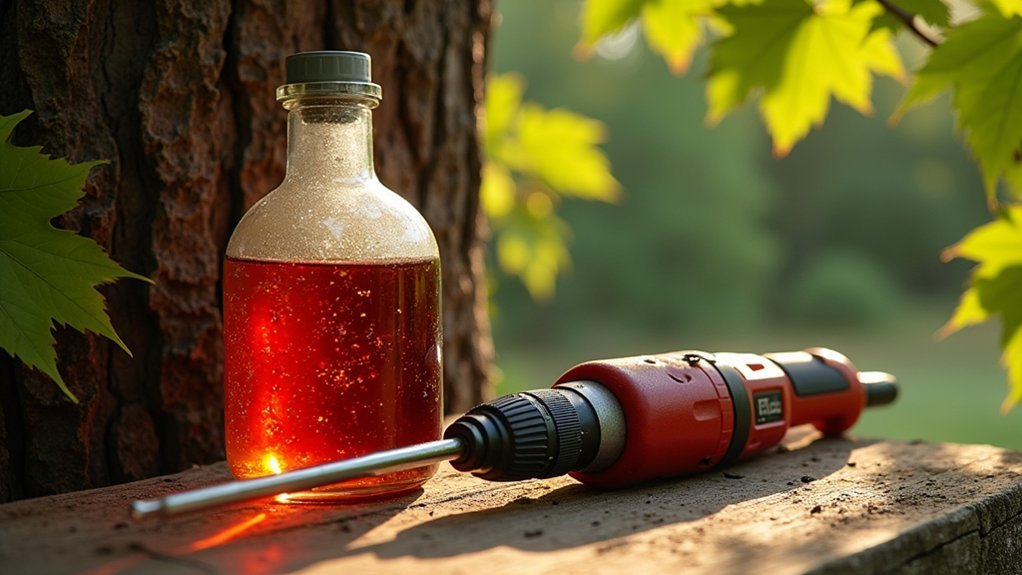
Urban maple tapping requires a specialized kit including a 5/16-inch drill bit, spouts that minimize tree damage, and food-grade collection containers.
You'll need to clean all equipment with a bleach solution and rinse thoroughly before use to guarantee your sap remains uncontaminated.
When setting up your city tapping operation, choose sealed buckets that prevent overflow during peak flow periods and can be discreetly stored in limited urban spaces.
Tapping Kit Essentials
Before heading out to tap your backyard maple trees, you'll need to gather the right equipment for a successful sap collection. A 5/16 or 7/16 inch drill bit, clean spouts, food-grade containers, and a hammer are absolute necessities for your tapping kit.
Remember to properly clean all equipment with a 1:20 bleach-to-water solution before use to prevent contamination and guarantee quality sap. When installing spouts, tap them gently into freshly drilled holes at a slight upward angle to create a tight seal.
- Use dedicated sap buckets or large milk jugs for collection
- Keep a thermometer handy for monitoring syrup temperature during boiling
- Prepare storage solutions like coolers or snow banks for preserving collected sap
- Confirm your hammer or mallet is the right size for inserting spouts without damage
Urban Storage Solutions
Many city dwellers face unique challenges when storing maple sap in limited urban spaces. Food-grade containers like milk jugs or Smart Bottles are essential for safe sap collection in urban environments. They prevent contamination while maximizing limited storage areas.
For effective storage solutions, invest in large ground-level buckets with sealed lids to handle overflow during peak flows. Consider connecting spiles directly to collection vessels using rubber hoses to minimize debris contamination.
Maintain sap freshness by creating cool conditions—utilize snow banks if available or repurpose coolers with ice. Remember that sap spoils quickly at warm temperatures, so proper storage is vital before boiling sap.
Ensure you've stockpiled adequate fuel for boiling, whether wood or propane. The evaporation process takes longer than most beginners anticipate, requiring sustained heat.
Timing Your Tap: Weather Patterns and Seasonal Cues
Successful maple tapping depends on watching for the right freeze-thaw cycles, typically occurring between mid-February and mid-March when daytime temperatures climb above 32°F and nights drop below freezing.
You'll want to monitor weather forecasts closely, looking for several consecutive days of 40°F daytime temperatures followed by 20°F nights—conditions that create the pressure changes forcing sap to flow.
Your best sap yields will come early in the season during these temperature fluctuations, so prepare your equipment before the first spring thaws arrive.
Freeze-Thaw Cycle Importance
Understanding the freeze-thaw cycle is perhaps the most critical factor in successful maple tapping. Your trees need nighttime temperatures below freezing and daytime temperatures above freezing (ideally around 40°F) to create the pressure system that drives sap flows.
This natural pump typically operates best between mid-February and mid-March in most regions.
For ideal sap production, watch for:
- At least three consecutive days with the proper temperature swing
- Daytime temperatures consistently rising above freezing
- Nighttime temperatures reliably dropping below 32°F
- Local weather forecasts predicting stable freeze-thaw patterns
Spring Temperature Indicators
The perfect timing for maple tapping depends on recognizing key temperature patterns that signal ideal sap flow.
Watch for daytime temperatures consistently rising above 40°F while dropping below freezing at night—this significant freeze-thaw cycle creates ideal pressure within the tree.
Your tapping season typically runs from mid-February through mid-March, lasting 4-6 weeks.
The best sap is produced when you've observed several consecutive days of this temperature pattern.
Don't rush to tap at the first warm day; wait until weather forecasts show a stable pattern of warm days and freezing nights.
Local climate variations matter, so track your specific region's conditions.
When daytime temperature is above freezing followed by freezing at night for several consistent days, it's your signal that prime tapping conditions have arrived.
Ideal Tapping Window
While casual observers might miss it, experienced maple tappers recognize that hitting the perfect window maximizes both sap quantity and quality.
You'll want to target mid-February to mid-March when the ideal tapping window typically opens. This critical period aligns perfectly with nature's temperature dance that triggers sap flow.
- Watch for daytime temperatures rising above 32°F while nights remain below freezing – this temperature swing creates pressure that pushes sap through the tree
- Start early in the tapping season – the first few weeks often yield optimal sap production
- Monitor weather forecasts – consecutive days with warm days and freezing nights signal prime collection time
- Be prepared to act quickly – the best collection window might only last 4-6 weeks in many regions
Proper Drilling and Spile Installation Techniques
Five critical steps guarantee successful maple tree tapping, beginning with proper drilling technique.
Drill a hole 1.5 to 2 inches deep at a slight upward angle using a 5/16 inch bit to guarantee ideal sap flow without causing tree damage. Position your tap about 3 feet above ground and at least 6 inches from previous holes.
For effective spile installation, insert the spout firmly until it's flush with the bark, creating a snug fit that prevents leakage. If you're using larger spiles, switch to a 7/16 inch drill bit. Always verify your spouts are compatible with your collection containers.
Don't forget to monitor your setup regularly. If you notice poor sap flow or leakage around the spile, you'll need to make adjustments to maximize your maple syrup yield.
Efficient Sap Collection Methods for Small-Scale Operations
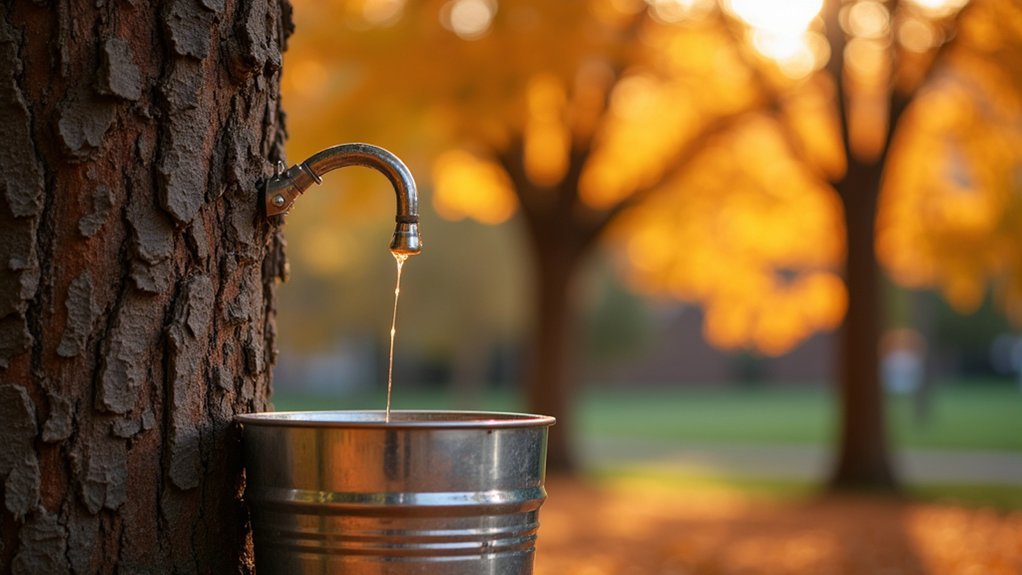
Once you've properly installed your spiles, collecting the flowing sap becomes your next priority. For best sap yield when you tap maple trees, use large food-grade sap buckets with sealed lids to prevent contamination and overflow during peak flow periods.
The right collection setup ensures maximum sap yield while maintaining quality through proper containment and protection from contaminants.
- Connect rubber hoses directly from spiles to collection containers to minimize exposure to insects and debris.
- Check containers regularly, especially during warm weather when sugar content and flow rates increase.
- Store collected sap in cool, shaded areas or snow banks to prevent spoilage.
- Time your collection around freezing nights and warm days to maximize sap flow.
Remember that sap can spoil quickly in warm temperatures, so aim to boil your collected sap as soon as possible to preserve freshness and quality.
From Sap to Syrup: Boiling Basics for Apartment Dwellers
Living in an apartment doesn't mean you can't enjoy the rewarding process of transforming maple sap into delicious syrup. You'll need to adapt your boiling setup for indoor limitations while maintaining efficiency.
After you collect the sap, process it within 24 hours to prevent spoilage. If you can't boil immediately, refrigerate it.
For apartment boiling, use a small gas range with proper ventilation—the process creates significant steam.
Maintain at least 1.5 inches of sap depth in your pan to prevent burning. Remember, you'll need 10-15 gallons of sap to produce just one gallon of syrup.
Monitor sugar concentration carefully, finishing when the syrup reaches 7.1°F above water's boiling point.
While hot, filter to remove sugar sand, then reheat to 180°F before canning.
Frequently Asked Questions
Should I Tap My Maple Trees Now?
You should tap your maple trees if it's mid-February to mid-March with days above freezing and nights below freezing. Check your tree's health and diameter (12+ inches), and monitor weather for three consecutive favorable days.
What Maple Trees Are Best for Tapping?
Sugar Maples are your best choice for tapping, with highest sugar content. Black, Red, and Silver Maples are good alternatives. Choose healthy trees at least 12 inches in diameter, and focus on those getting full sunlight.
What Time of Day Do You Tap Maple Trees?
You'll get the best sap flow when you tap maple trees in late morning or early afternoon. It's ideal to wait until temperatures rise above freezing, especially on sunny days when the warmth stimulates more sap movement.
At What Height Should You Tap a Maple Tree?
You'll want to tap your maple tree about 3 feet from the ground. This height gives you easy access while being above major roots and below significant branches. It's also comfortable to work at waist level.
In Summary
You're now equipped to transform your backyard maples into liquid gold producers! Remember, patience and attention to detail make all the difference. Start small, learn from each season, and you'll soon master the art of urban maple syrup production. Whether you've got a spacious yard or a tiny balcony, there's nothing quite like pouring your own homemade syrup over Sunday pancakes.
Leave a Reply